I will describe how I created a Page Layout based on a custom Content Type with SharePoint 2010 (beta2).
I will call my Content Type: PicturePageContentType
To do this:
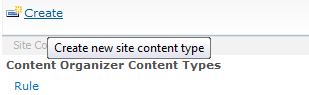
- Go to: Site Settings –> Site content types
- Next, click Create

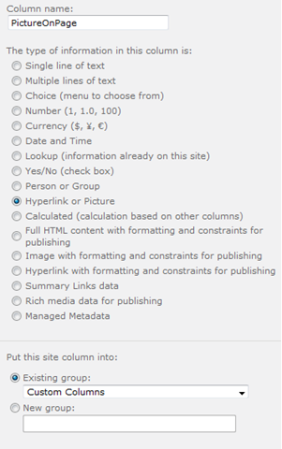
In the following screen you insert information about the content type.
An import thing to do is let it inherit from the right parent content type.
This needs to be from the group: Publishing Content Types and the parent needs to be Page.

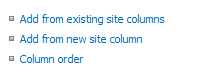
So far nothing special, next I added some non existing columns.
On the following page click Add from new site column.

Define in the screen the follows up the columns that you would like to add to the your content type (Page Layout in the end).
After you added all the columns you needed you can overview it when you’re looking at you content type. You’ll see that I added Page Content, this was one from the already existing site columns.
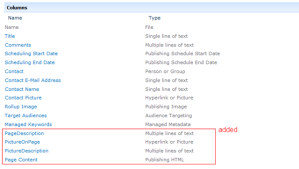
Note: If you added a from column to your page you cannot delete it:) If you want to get rid of it you need to delete the whole content type.
In this part I’m using Visual Studio for this. It’s not the most common way to do it but I want to stay in control of my own files without uploading/approving etc. it in the web browser.
You can do it trough the browser by going to Master pages and page layouts in Site Settings.
Then add a new Page Layout based on the content type, but I’m doing it the hard way.
First of all if you going to do this in Visual Studio you’ll need this extension:
http://visualstudiogallery.msdn.microsoft.com/en-us/990bd0c8-a55b-4643-a35d-88136594c3d9
Now create a SharePoint Project in Visual Studio.
In the Server Explorer you’ll see your SharePoint Connections, then browse al the way to your Content Type you just created.
Right click on it –> Create Page Layout
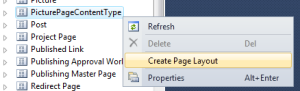
Note: This option will only be available if you installed the extension. This option will be disabled if you didn’t selected Page as parent of your Content Type.
Keep this file open we’ll save it after we created a Module.
Right click on you SharePoint project –> Add –> New Item –> SharePoint 2010 –> Module
I called the Module: PageLayoutModule
Delete the Sample.txt from the module.
Now save the Page Layout file into the Module, this is a bit strange. To save it to the Module you just created navigate in your save window to your project directory on your local disk and then save it in the Module directory. Now it’s not visible yet in your solution so navigate to the directory again but this time in your Windows Explorer. Right click on your pagelayout.aspx file –> Copy. Finally right click on your Module in the Solution Explorer –> Paste.
Note: If someone knows a more handy way to do this please tell me.
First thing is to edit it like this (except the filename):
The following step is to add some properties to the File. These properties are:
The Property PublishingAssociatedContentType needs special attention.
The first one (bold) is the name of the Content Type in my case: PicturePageContentType
The second one (bold and underlined) is the Content Type ID.
To get the Content Type ID you can right click on the Content Type in the Server Explorer and then click Properties. In the properties window that popups you can find the the Content Type ID.
Now that we have our Content Type ID we can fill it in into the property value. Your Elements.xml should look something like this.
Content Type
First thing to do is to define a content type.I will call my Content Type: PicturePageContentType
To do this:
- Go to: Site Settings –> Site content types
- Next, click Create
In the following screen you insert information about the content type.
An import thing to do is let it inherit from the right parent content type.
This needs to be from the group: Publishing Content Types and the parent needs to be Page.

So far nothing special, next I added some non existing columns.
On the following page click Add from new site column.
Define in the screen the follows up the columns that you would like to add to the your content type (Page Layout in the end).

After you added all the columns you needed you can overview it when you’re looking at you content type. You’ll see that I added Page Content, this was one from the already existing site columns.
Note: If you added a from column to your page you cannot delete it:) If you want to get rid of it you need to delete the whole content type.
Create the Page Layout
In this part I’m using Visual Studio for this. It’s not the most common way to do it but I want to stay in control of my own files without uploading/approving etc. it in the web browser. You can do it trough the browser by going to Master pages and page layouts in Site Settings.
Then add a new Page Layout based on the content type, but I’m doing it the hard way.
First of all if you going to do this in Visual Studio you’ll need this extension:
http://visualstudiogallery.msdn.microsoft.com/en-us/990bd0c8-a55b-4643-a35d-88136594c3d9
Now create a SharePoint Project in Visual Studio.
In the Server Explorer you’ll see your SharePoint Connections, then browse al the way to your Content Type you just created.
Right click on it –> Create Page Layout
Note: This option will only be available if you installed the extension. This option will be disabled if you didn’t selected Page as parent of your Content Type.
Keep this file open we’ll save it after we created a Module.
Right click on you SharePoint project –> Add –> New Item –> SharePoint 2010 –> Module
I called the Module: PageLayoutModule
Delete the Sample.txt from the module.
Now save the Page Layout file into the Module, this is a bit strange. To save it to the Module you just created navigate in your save window to your project directory on your local disk and then save it in the Module directory. Now it’s not visible yet in your solution so navigate to the directory again but this time in your Windows Explorer. Right click on your pagelayout.aspx file –> Copy. Finally right click on your Module in the Solution Explorer –> Paste.
Note: If someone knows a more handy way to do this please tell me.
Elements.xml
To deploy everything right there need to be some information added to the Elements.xml.First thing is to edit it like this (except the filename):
<?xml version="1.0" encoding="utf-8"?> <Elements xmlns="http://schemas.microsoft.com/sharepoint/"> <Module Name="PageLayoutModule" Url="_catalogs/masterpage"> <File Path="PageLayoutModule\Picturepagecontenttype.aspx" Url="Picturepagecontenttype.aspx" Type="GhostableInLibrary"> </File> </Module> </Elements> |
<Property Name="Title" Value="Page Layout with picture" /> <Property Name="MasterPageDescription" Value="Page Layout with picture" /> <Property Name="ContentType" Value="$Resources:cmscore,contenttype_pagelayout_name;" /> <Property Name="PublishingPreviewImage" Value="~SiteCollection/_catalogs/masterpage/$Resources:core,Culture;/Preview Images/WelcomeSplash.png, ~SiteCollection/_catalogs/masterpage/$Resources:core,Culture;/Preview Images/WelcomeSplash.png" /> <Property Name="PublishingAssociatedContentType" Value=";#PicturePageContentType;#0x010100C568DB52D9D0A14D9B2FDCC96666E9F200 7948130EC3DB064584E219954237AF3900A2F715DA6BDAD944B8D20AFA28B7980E;#" /> |
The first one (bold) is the name of the Content Type in my case: PicturePageContentType
The second one (bold and underlined) is the Content Type ID.
To get the Content Type ID you can right click on the Content Type in the Server Explorer and then click Properties. In the properties window that popups you can find the the Content Type ID.
Now that we have our Content Type ID we can fill it in into the property value. Your Elements.xml should look something like this.
<?xml version="1.0" encoding="utf-8"?> <Elements xmlns="http://schemas.microsoft.com/sharepoint/"> <Module Name="PageLayoutModule" Url="_catalogs/masterpage"> <File Path="PageLayoutModule\Picturepagecontenttype.aspx" Url="Picturepagecontenttype.aspx" Type="GhostableInLibrary"> <Property Name="Title" Value="Page Layout with picture" /> <Property Name="MasterPageDescription" Value="Page Layout with picture" /> <Property Name="ContentType" Value="$Resources:cmscore,contenttype_pagelayout_name;" /> <Property Name="PublishingPreviewImage" Value="~SiteCollection/_catalogs/masterpage/$Resources:core,Culture;/Preview Images/WelcomeSplash.png, ~SiteCollection/_catalogs/masterpage/$Resources:core,Culture;/Preview Images/WelcomeSplash.png" /> <Property Name="PublishingAssociatedContentType" Value=";#PicturePageContentType;#0x010100C568DB52D9D0A14D9B2FDCC96666E9F200 7948130EC3DB064584E219954237AF3900C10F04A5A63B6E40B4347CDDAF7A0585;#" /> </File> </Module> </Elements> |
No comments:
Post a Comment